Newsletter Subscription

Showing posts with label lut polimeric. Show all posts

Friday, October 25, 2013

Applique Technique Flower Tutorial


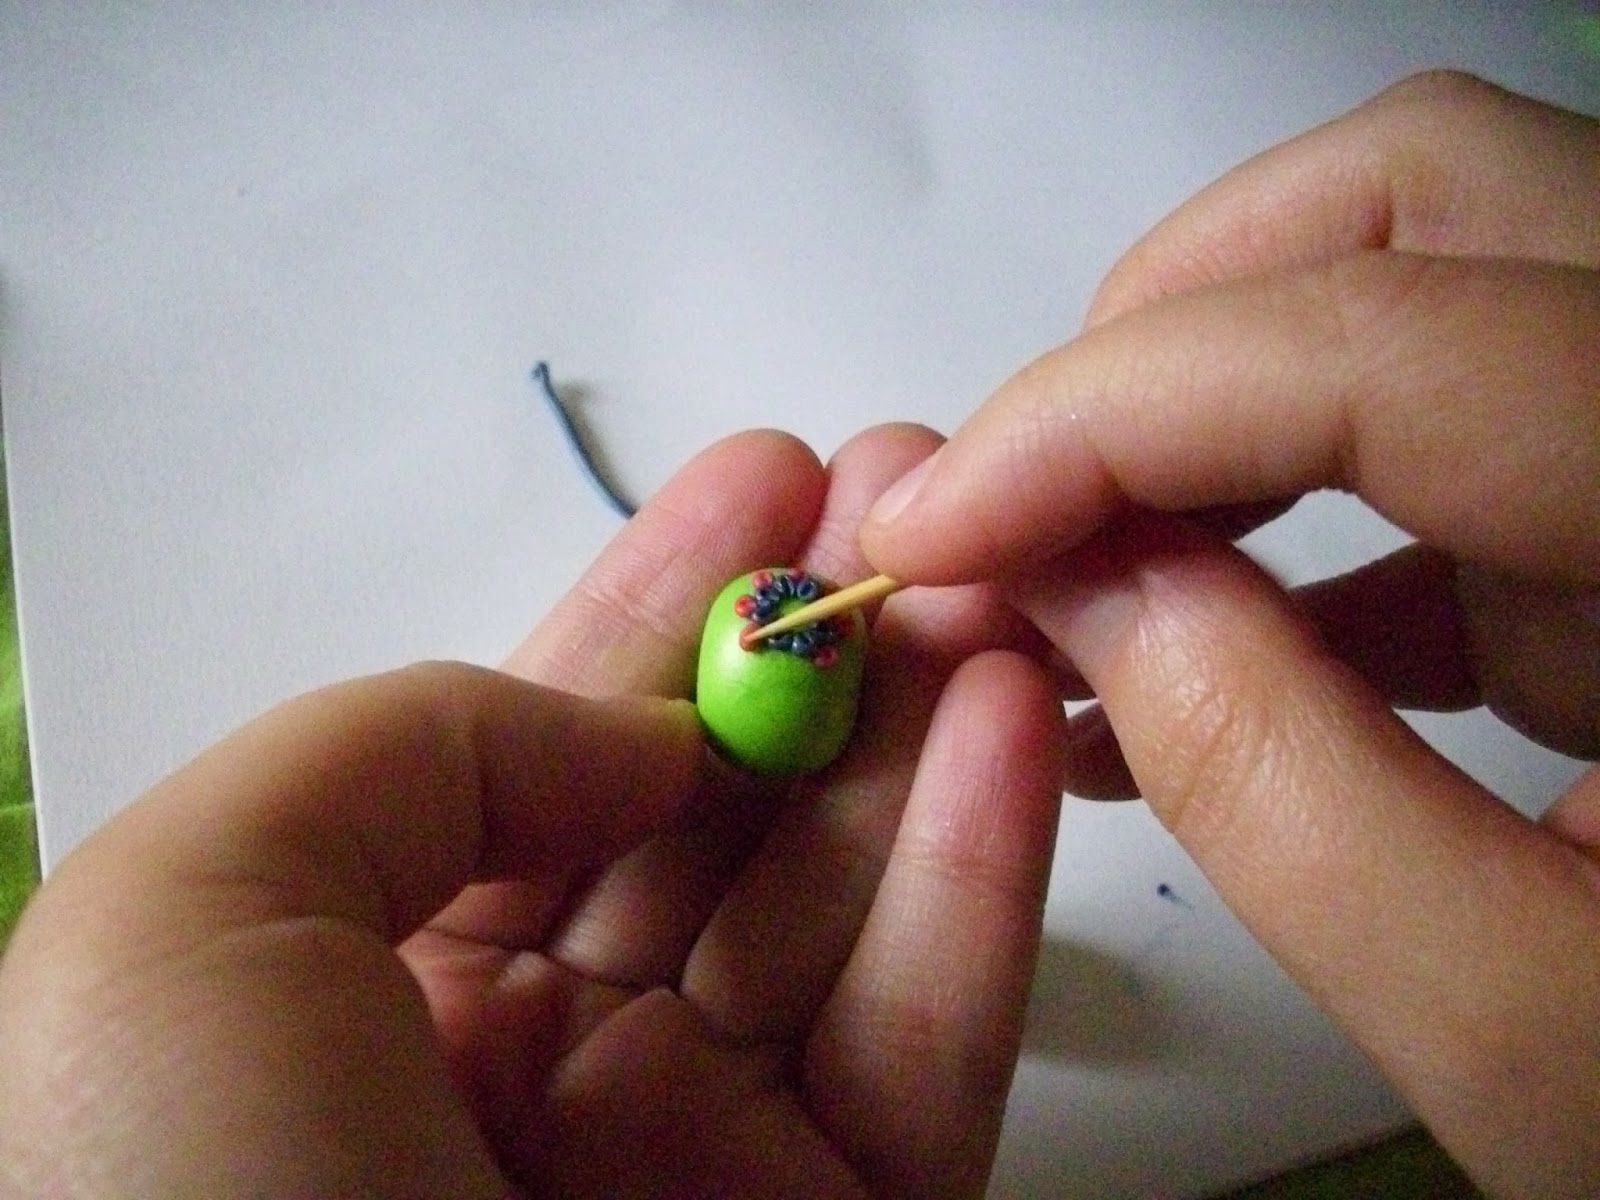
I promised you a tutorial and here it is. You will learn how to make earrings like the ones in the following image.

Asa cum v-am promis va prezint mai jos un tutorial prin care sa invatati cum sa faceti cercei ca cei verzi din imagine. De fapt, aceeasi.

So let's start!
Sa incepem!


Tips:
-use a toothpick or a thicker needle to make rounder shapes
-continue applying petals in the free spaces that are formed to create a bigger and more detailed flower
-you can use different petal sizes and shapes  for interesting effects

Sfaturi:
- folositi o scobitoare sau un ac mai gros pentru a da forme mai rotunde
- continuati sa puneti petale in spatiile libere dintre petalele deja puse pentru a face o floare mare si detaliata
-puteti folosi marimi de petale diferite sau forme diferite pentru efecte mai interesante


Saturday, June 29, 2013

Rain, water, oceans and seas.../ Ploaie, apa, oceane si mari...

...all have inspired me to create this pendant. I used a marbled type of polymer clay and I really loved the effect I got in the end. I wanted something blue and pretty simple and I hope I obtained that with this pendant.

...toate m-au inspirat sa fac acest pandantiv. Am folosit un lut polimeric marmorat si mi-a placut foarte mult effectul de la final. Voiam ceva albastru si destul de simplu asa ca sper ca am obtinut asta.

polymer clay, girl, pendant, handmade, fetita, fimo

polymer clay, pendant, handmade, blue, fetita, fimo


Wednesday, June 26, 2013

Tropical Challenge Revista Atelierul

Revista Atelierul has a tropical challenge and I've submitted the following girl to them. I loved this challenge so much and I loved working with such bright and beautiful colors. I know I've mentioned this before, but Revista Atelierul challenges always inspire me and I can't wait to see what the challenge is going to be for the next month.

Revista Atelierul are o provocare tropicala si am trimis urmatoarea lucrare. Mi-a placut foarte mult aceasta provocarea si mi-am dat seama ca imi place sa lucrez cu culori mai deschise. Stiu ca am mai spus asta dar provocarile Revistei Atelierul mereu ma inspira si abia astept sa vad ce au pregatit pentru luna viitoare.

fetita fimo, fimo girl, orange

Monday, June 24, 2013

Abstract Geometry 3

I made them using this tutorial: http://craftartedu.com/bettina-welker-tiny-steps-brooch
but I didn't use a ruler so my result is not that amazing.

Le-am facut folosind acest tutorial insa nu am folosit o rigla asa ca nu au iesit extraordinare.


Thursday, June 6, 2013

Summer Pendant - Pandantiv Vara

I made a new pendant for a Summer themed contest. I wanted to create something unique so I tried to paint with small pieces of polymer clay the background on this pendant. I am OK with the end result, considering that this is the first pendant I did with this technique and I hope future ones will look better.

Am facut un pandantiv nou pentru un concurs cu tema Vara pentru Breslo. Am vrut sa creez ceva unic asa ca am incercat sa pictez cu bucatele mici de lut polimeric fundalul. Mi se pare ca rezultatul este ok considerand ca asta este primul pandantiv pe care l-am facut cu aceastatehnica si sper ca cele pe care le fac in viitor sa arate mai bine. 


Monday, May 6, 2013

Fire and Ice Necklace/ Colier Fire and Ice

Hello Everyone! I hope you had a great time during Easter holidays and I hope everyone is in good health after eating chocolate bunnies I wanted to make a necklace that would inspire you to wear red and feel beautiful so here it is. I worked a lot on this and loved it and I hope you guys like it.

Salutare la toata lumea! Sper ca v-ati simtit bine de sarbatori si sper ca toata lumea este sanatoasa dupa ce a mancat iepurasi de ciocolata. Am vrut sa fac un colier care sa va inspire sa purtati rosu sii sa va simtiti frumoase asa. Am muncit mult la el si mi-a placut asa ca sper sa va placa si voua.


Thursday, May 2, 2013

3D Organza Pendant Tutorial

After baking and glazing
I always loved organza, it's a really nice and elegant material. Most of the time I use it to hang pendants on, I don't like fancy stuff and the simplicity of it makes more complicated things stand out. However, you can use them differently, this time by adding the material on the pendant. All you need is:
- liquid polymer clay (preferably fimo as it is the most transparent brand)
- any polymer clay color
- scissors
- organza material with some print on it
- metallic hooks

Mereu mi-a placut materialul organza, e un material care are o eleganta aparte. De cele mai multe ori pandantivele mele vin agatate de organza; nu-mi plac chestiile prea extravagante iar simplitatea materialului face ca pandantivele mai complicate sa iasa in evidenta. Aveti nevoie de:
- lut polimeric lichid ( preferabil fimo deoarece este cel mai transparent) 
- orice culoare de lut polimeric
- foarfeca
- material organza cu imprimeu
- accesorii metalice (agatatori)

1. You first start by flattening your piece of clay. Here I used a combination of green and yellow to make an interesting pattern underneath the organza fabric.

1. Intai intindem o bucata de lut. Eu am folosit o combinatie de verde si galben deoarece voiam un model mai interesant sub material.


2. We cut a square shape.
2 Taiem lutul intr-o forma patrata. 


3. We do the same thing to make the pendant's front side and we cut a round shape in it.
3. Procedam la fel cu o alta bucata de lut care va fi fata pandantivului si taiem cu o forma rotunda.


4.We take a piece of organza (here I used a small organza pouch) and we cut a piece the size of our first rectangle

4. Luam o bucata de organza (aici un saculet mic) si taiem o bucata cat primul nostru patrat.


5.We take the first square piece and put a lot of translucent liquid clay on it.
5. Luam primul patrat taiat si punem mult lut lichid.

6.We apply our organza square on the square with liquid clay and add more liquid clay on top and we spread it evenly.
6. Aplicam patratelul de organza pe patratelul pe care am pus lut lichid inainte si adaugam mai mult lut lichid peste, pe care il intindem in mod egal.

7.We cut some pieces of clay that will serve as frames and as a base for the pendant. We apply them on the organza square.
7. Taiem niste bucatele de clay care vor servi ca rame si baza pandantivului nostru. Le aplicam pe patratelul cu organza.

8.We apply the rectagle piece of clay that has the round shape cut in it and we take a piece of rolled clay to make a frame for our pendant
8. Aplicam bucata de lut in care am taiat forma rotunda si luam o bucata de lut rulat pentru a face o rama pentru pandantiv

9.Cu ajutorul unei scobitori facem modele pe margine si aplicam accesoriu metalic.
9. We make different patterns on the sides and add the metallic hook.


10. We make small indents on the edge of the round shape in the middle (with a toothpick)and embellish the pendant with acrylic paint.
10. Facem mici adancituri pe marginea formei rotunde din mijloc cu o scobitoare si decoram pandantivul cu acrilice.

End result before curing:
Rezultatul final inainte de coacere:


Monday, April 29, 2013

Curing polymer clay in a gas oven without thermometer/ Cum sa coci lutul polimeric in cuptorul cu gaz fara termometru


Because not all of you out there have an electric oven and can't really check the temperature in a gas oven without a thermometer, there are some tips that will probably help you. Also, you can't miss out on experimenting with this great medium just because you don't have an electric oven and you might also miss out on some skill development until you get one. Since I've been working with polymer, I've had some accidents regarding its curing temperature and I've learned a few things I want to share with you.

I've lived in various places and many times I didn't have the utensils necessary to craft with me (you can’t really carry everything around with you all the time) and I had to improvise. Since I've used many types of ovens for baking clay, there are some tips that apply to all.
 

1 - Always preheat the oven, it depends a lot on the gas pressure but usually you have to preheat it for about 10 minutes on minimum.

2 - After preheating the oven put your sculptures, jewelry, etc. inside and make sure that you keep it on the minimum. If you want to be sure that the temperature is over 110/130 degrees Celsius (230/266 F) you can put a bowl of water inside and when it starts boiling you know that the water has reached 100 degrees Celsius and you can put in your things. Remember to keep it on minimum.

3. I usually bake things for 15 minutes if it's a new type of oven I'm not familiar with, and inspect them closely afterwards to see if they are burned or cracked. Make sure that you do that. Afterwards you can bake them a bit longer until you are satisfied with the result with lower or higher temperature.

4. Place a bit of polymer clay with the items you bake and you can cut it or stick something in it to see whether is done or not. This way you won't risk cutting the good pieces.

5.You can also microwave your clay, but I never tried it. However, you can check out this page here where a few tests have been done.

6. Remember that some clays will change colors during baking, so you need to make a test with a few pieces of clay if the project you are making needs exact colors.

7. You have to keep in mind that polymer clay, when it’s just out of the oven, will still be elastic, so it might appear uncured. If you think it’s cured, you should wait for it to cool down and you can try and bake it again.

8. Polymer clay can be cured multiple times in the oven, even when it’s already cured and hardened; you will need this for some projects so don’t be afraid to do it, nothing will happen if you respect the temperatures and curing time. Speaking of temp and time, you should also keep in mind that some brands of polymer clay have different curing times and different temperatures, you will need this if you are trying to combine them. For example Cernit needs a higher curing temperature than Fimo.

I’ve made some charts that you will certainly find useful (scroll over the Romanian text):


Pentru ca nu toata lumea are un cuptor electric si nu prea poti sa masori temperatura la cuptorul cu gaz fara termometru, voi veni cu cateva sfaturi care sa va ajute in directia asta. De asemenea, nu trebuie sa pierzi experienta cu acest mediu minunat doar pentru ca nu ai cuptor electric si s-ar putea sa pierzi si cateva ore bune de dezvoltare a indemanarii in directia asta. De cand lucrez cu lut polimeric, am avut cateva accidente in timpul coacerii si am invatat cateva lucruri pe care vreau sa vi le transmit si voua.

A trebuit sa ma mut des si de multe ori nu am avut ustensilele necesare sa fac anumite lucruri (nu prea poti sa cari totul cu tine) asa ca a trebuit sa improvizez. Din moment ce am folosit mai multe tipuri de cuptoare pentru a coace lutul, am invatat cateva lucruri care se aplica la absolut toate cuptoarele.

1- Intotdeauna se va incinge cuptorul inainte de coacere; in functie de presiunea gazelor se poate tine mai mult dar in general aproximativ 10 minute este perfect.

2- Dupa ce cuptorul a fost incins, se pun proiectele inauntru si se da pe minim. Daca vreti sa fiti siguri ca temperatura a ajuns la 110 grade Celsius, puteti pune inauntru apa si atunci cand aceasta incepe sa fiarba stiti ca a ajuns sigur la 100 grade.

3- De obicei eu tin pentru 15 minute proiectele daca este un tip de cuptor nefamiliar mie, si dupa aceste 15 minute le scot si le analizez. Veti observa ca daca a fost dar focul prea tare, vor mirosi ciudat si isi vor fi schimbat culoarea. Dupa, le puteti pune pentru inca 5-10 minute in cuptor pana obtineti rezultatul dorit.

4- Pentru a elimina orice risc puneti o bucatica de lut polimeric pe tava de coacere si atunci cand nu sunteti sigur daca s-au polimerizat puteti intepa bucata respectiva. Daca se rupe foarte usor, mai trebuie tinute.

5- Puteti sa folositi si cuptorul cu microunde dar personal nu am incercat niciodata. Puteti gasi mai multe detalii pe aceasta pagina.


6- Tineti minte ca unele tipuri de lut isi pot schimba culoarea cand sunt coapte, asa ca daca aveti un proiect care necesita niste culori exacte, puteti face teste cu bucatele mici de lut inainte.

7- De asemenea, trebuie sa tineti seama de faptul ca lutul polimeric imediat scos din cuptor va fi in continuare elastic asa ca poate parea necopt. Daca credeti ca s-a copt, asteptati sa se raceasca si il mai puteti coace inca o data.

8- Lutul se poate coace de nenumarate ori in cuptor chiar daca s-a intarit, pentru unele proiecte este nevoie de coaceri multiple asa ca sa nu va fie frica sa o faceti, nu se va intampla nimic daca respectati temperaturile si durata. Si daca tot vorbim de temperatura si durata, tineti seama de faptul ca unele firme de lut au timpuri si temperaturi diferite, mai ales atunci cand incercati sa le combinati, de exemplu Cernit trebuie copt la o temperatura mai mare decat Fimo.


Am facut niste grafice utile mai jos: 


Saturday, April 20, 2013

Armenian Inspired Part 6


Here is the last part of my Armenian collection. I saved the best for last. These are the Armenian pagan goddesses. My source for the descriptions is Wikipedia.

Aceasta este ultima parte din colectia Armeniana si am pastrat ce era mai bun pentru final. Urmatoarele pandantive intruchipeaza zeitele pagane armeniene si o figura nationala cunoscuta. Sursa pentru descrieri a fost Wikipedia. 


Anahit


polymer clay, girl, armenian, ethnic

Anahit is the goddess of fertility and healing, but also the goddess of wisdom and water. In Armenian Mythology she also appears as the goddess of war and by the 5th century she was the main deity in Armenia.

Anahit este zeita fertilitatii si vindecarii dar si a intelepciunii si a apei. In Mitologia Armeniana ea apare si ca zeita razboiului si pana in secolul al 5-lea devine una dintre cele mai importante zeitati din Armenia.


Asya
polymer clay, girl, armenian, ethnic
made with beautiful shades of blue and other colors that
make us think about water/ sea/ healing 
In the earliest prehistoric period Astghig, commonly referred to as Asya, Astghik, or Astlik, (Armenian: the later heathen period she became the goddess of love, maidenly beauty, and water sources and springs. Her Hence, the name is not believed to be related to Semitic Ishtar.


In perioada preistorica Astghig, Asya, Astghik sau Asktlik sunt nume pentru aceeasi zeitate. Astghig este zeita paganda a fertilitatii si dragostei cu cerul fiind considerat o personificare a ei. Mai tarziu devine zeita iubirii, a frumusetii tineresti si a apei si izvoarelor. Numele este diminutivul de la astg, care inseamna stea.
Nane
  
polymer clay, girl, armenian, ethnic
Pendant showing Nane, the war god.
Nane (Armenian: Նանե, Nanė; Georgian: ნანა, Nana; Bulgarian: Нане, Nanė; Russian: Нанэ, Nanė) was an Armenian pagan mother goddess. She was the goddess of war, wisdom, and motherhood, and the daughter of the supreme god Aramazd.

Nane looked like a young beautiful woman in the clothing of a warrior, with spear and shield in hand, like the Greek Athene, with whom she identified in the Hellenic period.

Nane este zeita razboiului, a intelepciunii si a maternitatii dar si fiinca supremului zeu Aramazd. Nane era o femeie frumoasa si tanara in armura cu o sulita si un scut in mana, fiind adesea comparata cu Atena.


Nar

polymer clay, girl, armenian, ethnicTsovinar or Nar was the Armenian goddess of water, sea, and rain. She was a fire creature, who forced the rain and hail to fall from the heavens with her fury.
Her name Tsovinar means "Nar of the sea".


Nar a fost zeita Armeniana a apei, a marii si a ploii. Ea era o creatura de foc care forta ploaia sa cada din cer cu furia ei. Tsovinar, celalat nume al ei inseamna “Nar a marii”