.JPG) |
| After baking and glazing |
- liquid polymer clay (preferably fimo as it is the most transparent brand)
- any polymer clay color
- scissors
- organza material with some print on it
- metallic hooks
Mereu mi-a placut materialul organza, e un material care are o eleganta aparte. De cele mai multe ori pandantivele mele vin agatate de organza; nu-mi plac chestiile prea extravagante iar simplitatea materialului face ca pandantivele mai complicate sa iasa in evidenta. Aveti nevoie de:
- lut polimeric lichid ( preferabil fimo deoarece este cel mai transparent)
- orice culoare de lut polimeric
- foarfeca
- material organza cu imprimeu
- accesorii metalice (agatatori)
1. You first start by flattening your piece of clay. Here I used a combination of green and yellow to make an interesting pattern underneath the organza fabric.
1. Intai intindem o bucata de lut. Eu am folosit o combinatie de verde si galben deoarece voiam un model mai interesant sub material.
2. We cut a square shape.
2 Taiem lutul intr-o forma patrata.
3. Procedam la fel cu o alta bucata de lut care va fi fata pandantivului si taiem cu o forma rotunda.
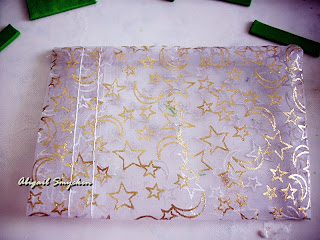
4.We take a piece of organza (here I used a small organza pouch) and we cut a piece the size of our first rectangle
4. Luam o bucata de organza (aici un saculet mic) si taiem o bucata cat primul nostru patrat.
5.We take the first square piece and put a lot of translucent liquid clay on it.
5. Luam primul patrat taiat si punem mult lut lichid.
6.We apply our organza square on the square with liquid clay and add more liquid clay on top and we spread it evenly.
6. Aplicam patratelul de organza pe patratelul pe care am pus lut lichid inainte si adaugam mai mult lut lichid peste, pe care il intindem in mod egal.
7.We cut some pieces of clay that will serve as frames and as a base for the pendant. We apply them on the organza square.
7. Taiem niste bucatele de clay care vor servi ca rame si baza pandantivului nostru. Le aplicam pe patratelul cu organza.
8.We apply the rectagle piece of clay that has the round shape cut in it and we take a piece of rolled clay to make a frame for our pendant
8. Aplicam bucata de lut in care am taiat forma rotunda si luam o bucata de lut rulat pentru a face o rama pentru pandantiv
9.Cu ajutorul unei scobitori facem modele pe margine si aplicam accesoriu metalic.
9. We make different patterns on the sides and add the metallic hook.
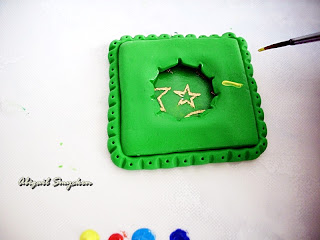
10. We make small indents on the edge of the round shape in the middle (with a toothpick)and embellish the pendant with acrylic paint.
10. Facem mici adancituri pe marginea formei rotunde din mijloc cu o scobitoare si decoram pandantivul cu acrilice.
End result before curing:
Rezultatul final inainte de coacere:


No comments:
Post a Comment